
What is a Layout ?
A Layout specify the alignment of widgets (such as Text, Buttons, EditText box) as we can see in our Android Application screen or activity. All the visual structure we see in our android app is designed using different Layouts in android.
I have already discussed the different layouts in android in my previous tutorial on android layout. Before you proceed with this linear layout tutorial, just have an idea about the layouts in android.
Android LinearLayout that arranges other views either horizontally in a single column or vertically in a single row. Which means that a LinearLayout is a view group that aligns all children in a single direction either vertically or horizontally using the android:orientation attribute. 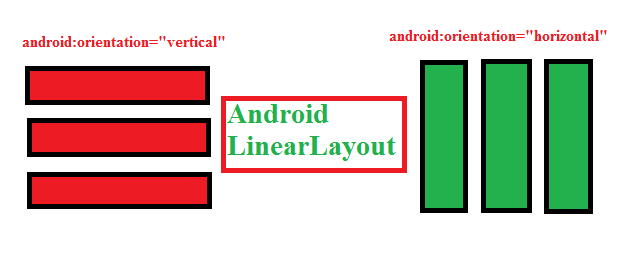
You can specify the layout direction vertical or horizontal when you use LinearLayout with android:orientation attribute.
Android LinearLayout
Linear layout is a simple layout used in android programming for layout designing. The value for orientation property of LinearLayout can be either horizontal or vertical for arranging the views.
Linear Layout Orientation types
There are two types of orientation in LinearLayout
1. Vertical.
2. Horizontal.
1. Vertical
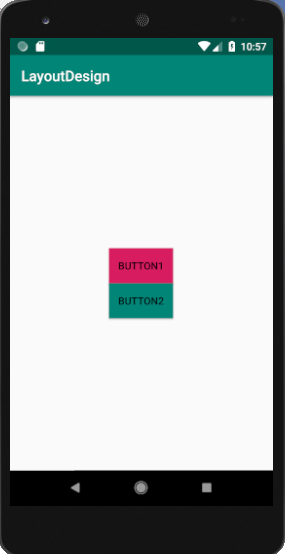
If the attribute value of orientation is vertical, all the child are arranged in a line one after the other vertically.
The layout design for android:orientation attribute vertical is shown below.
activity_main.xml
<?xml version="1.0" encoding="utf-8"?>
<LinearLayout xmlns:android="http://schemas.android.com/apk/res/android"
    android:layout_width="match_parent"
    android:layout_height="match_parent"
    android:orientation="vertical"
    android:gravity="center">
    <!-- Vertical Orientation set -->

    <!-- Child Views(In this case 2 Button) are here -->
    <Button
        android:layout_width="wrap_content"
        android:layout_height="wrap_content"
        android:text="Button1"
        android:id="@+id/button"
        android:background="@color/colorAccent" />

    <Button
        android:layout_width="wrap_content"
        android:layout_height="wrap_content"
        android:text="Button2"
        android:id="@+id/button2"
        android:background="@color/colorPrimary" />

</LinearLayout>
The design of the above code which looks like
2. Horizontal
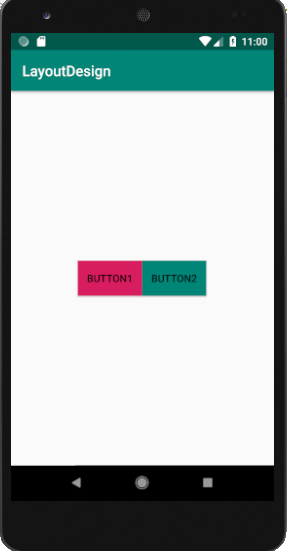
If the attribute value of orientation is horizontal , all the child are arranged horizontally in a line one after the other.
The layout design for android:orientation attribute horizontal is shown below.
activity_main.xml
<?xml version="1.0" encoding="utf-8"?>
<LinearLayout xmlns:android="http://schemas.android.com/apk/res/android"
    android:layout_width="match_parent"
    android:layout_height="match_parent"
    android:orientation="horizontal"
    android:gravity="center">
    <!-- Horizontal Orientation set -->

    <!-- Child Views(In this case 2 Button) are here -->

    <Button
        android:layout_width="wrap_content"
        android:layout_height="wrap_content"
        android:text="Button1"
        android:id="@+id/button"
        android:background="@color/colorAccent" />

    <Button
        android:layout_width="wrap_content"
        android:layout_height="wrap_content"
        android:text="Button2"
        android:id="@+id/button2"
        android:background="@color/colorPrimary" />

</LinearLayout>
The design of the above code which looks like
gravity: The gravity attribute is an optional attribute which can be used to control the layout alignment like left, right, center, top, bottom etc.
The java class for loading the layout design is MainActivity.java. The code for MainActivity.java class is shown below.
MainActivity.java
package com.example.layoutdesign;

import android.support.v7.app.AppCompatActivity;
import android.os.Bundle;

public class MainActivity extends AppCompatActivity {

    @Override
    protected void onCreate(Bundle savedInstanceState) {
        super.onCreate(savedInstanceState);
        setContentView(R.layout.activity_main);
    }
}