How to Create Android Menus tutorial will teach you how to implement menu in your Android applications.
In android application menu is one of the important user interface entity which provides some action options for a particular view. In this tutorial I am discussing about how to create android menus.

How to Create Android Menus
To define the menu.xml file, first create a menu directory under res folder. This is done by right clicking on res –> new –> Android resource directory.
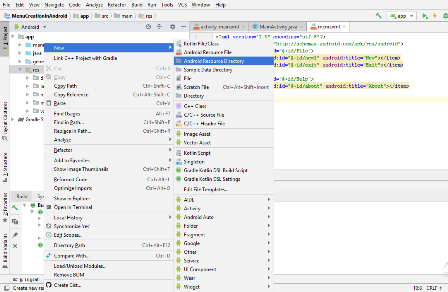
Then a new window will appear. Type menu in the directory name and choose menu in the Resource type. Then, click on OK.

A new menu directory would be made under res directory. Add menu.xml file in menu directory by right clicking on menu –> New –> Menu resource file.
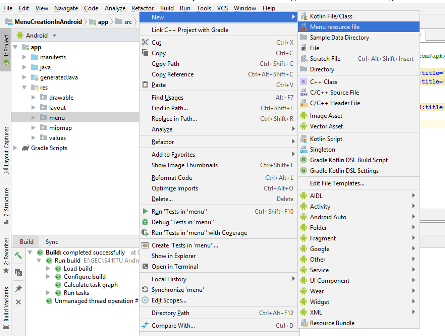
Give the name as menu.xml and click on Ok.

The menu.xml file contains the following tags :
-
- <menu>
It defines a Menu, which is a container for menu items. The <menu> tag is the root node for the file and can hold one or more <item> and <group> elements.
-
- <item>
It represents a single item in a menu. This element may contain a nested <menu> element in order to create a submenu.
-
- <group>
It is an optional, invisible container for <item> elements.
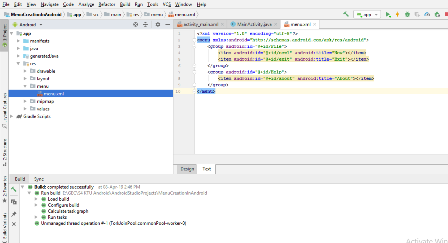
menu.xml
<?xml version="1.0" encoding="utf-8"?>
<menu xmlns:android="http://schemas.android.com/apk/res/android">
    <group android:id="@+id/File">
        <item android:id="@+id/new1" android:title="New"></item>
        <item android:id="@+id/exit" android:title="Exit"></item>
    </group>
    <group android:id="@+id/Help">
        <item android:id="@+id/about" android:title="About"></item>
        <item android:id="@+id/help" android:title="Help"></item>
    </group>
</menu>
Create an Option Menu
To make an option menu, we need to Override onCreateOptionsMenu() method as follows:
@Override
public boolean onCreateOptionsMenu(Menu menu){

    getMenuInflater().inflate(R.menu.menu, menu);
    return true;
}
getMenuInflater().inflate(R.menu.menu, menu);
inflate() method is used to inflate the menu_file.xml file. That is inflate() method is used to add the menu items in the action bar.
Handling Click Events on Item
When the user selects an item from the options menu, the system calls onOptionsItemSelected() method of activity. This method passes the MenuItem selected by the user.
You can identify the item by calling getItemId() method or getTitle() method, which returns the unique ID for the menu item or which return the title name of the menu item respectively. You can match this ID against known menu items to perform the appropriate action.
public boolean onOptionsItemSelected(MenuItem menuItem){
    if (menuItem.getTitle().toString().equals("Exit"))
    {
        finish();
        return true;
    }
    else if (menuItem.getTitle().toString().equals("New"))
    {
        Toast.makeText(this,"New Menu Clicked",Toast.LENGTH_LONG).show();
    }
    else if (menuItem.getItemId()==R.id.about){
        Toast.makeText(this,"About Menu Clicked",Toast.LENGTH_LONG).show();
    }
    else if (menuItem.getItemId()==R.id.help){
        Toast.makeText(this,"Help Menu Clicked",Toast.LENGTH_LONG).show();
    }
    return true;
}
Once you get a reference to the item selected by the user, you can perform any action based on the click events of each menu items.
The following is the layout for the project .
activity_main.xml
 <?xml version="1.0" encoding="utf-8"?>
<android.support.constraint.ConstraintLayout xmlns:android="http://schemas.android.com/apk/res/android"
    xmlns:app="http://schemas.android.com/apk/res-auto"
    xmlns:tools="http://schemas.android.com/tools"
    android:layout_width="match_parent"
    android:layout_height="match_parent"
    tools:context=".MainActivity">

    <TextView
        android:layout_width="wrap_content"
        android:layout_height="wrap_content"
        android:text="Hello World!"
        app:layout_constraintBottom_toBottomOf="parent"
        app:layout_constraintLeft_toLeftOf="parent"
        app:layout_constraintRight_toRightOf="parent"
        app:layout_constraintTop_toTopOf="parent" />

</android.support.constraint.ConstraintLayout>
The Activity class of the project is :
MainActivity.java
package com.example.menucreationinandroid;
import android.support.v7.app.AppCompatActivity;
import android.os.Bundle;
import android.view.Menu;
import android.view.MenuItem;
import android.widget.Toast;

public class MainActivity extends AppCompatActivity {

    @Override
    protected void onCreate(Bundle savedInstanceState) {
        super.onCreate(savedInstanceState);
        setContentView(R.layout.activity_main);
    }
    @Override
    public boolean onCreateOptionsMenu(Menu menu){

        getMenuInflater().inflate(R.menu.menu, menu);
        return true;
    }
    public boolean onOptionsItemSelected(MenuItem menuItem){
        if (menuItem.getTitle().toString().equals("Exit"))
        {
            finish();
            return true;
        }
        else if (menuItem.getTitle().toString().equals("New"))
        {
            Toast.makeText(this,"New Menu Clicked",Toast.LENGTH_LONG).show();
        }
        else if (menuItem.getItemId()==R.id.about){
            Toast.makeText(this,"About Menu Clicked",Toast.LENGTH_LONG).show();
        }
        else if (menuItem.getItemId()==R.id.help){
            Toast.makeText(this,"Help Menu Clicked",Toast.LENGTH_LONG).show();
        }
        return true;
    }
}
Output of the How to Create Android Menus is shown below.