Android TableLayout is used to arrange groups of views into rows and columns which is same as Table tag in HTML. In otherwords we can say that TableLayout is a ViewGroup that displays child View elements in rows and columns.
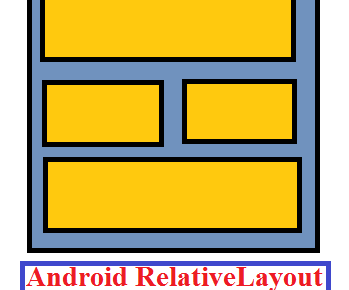
TableLayout structure is as shown below.
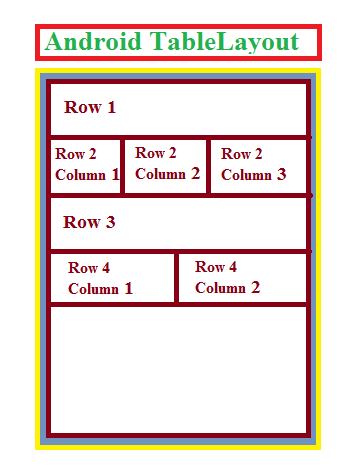 Android TableLayout
A layout that arranges its children into rows and columns called table layout. A TableLayout consists of TableRow objects, each defining a row.
TableLayout will not display border lines for their rows, columns, or cells. Each row has zero or more columns called cells; each cell can hold one View object.
A table row can leave cells empty. Cells can also span columns, same as in HTML.
The <TableRow> element is used to build a row in the table.
Android TableLayout Usage
Attribute android:layout_column=”1″ specifies the location of the view or the column name.
Android table layout is declared using <TableLayout> tag.
<TableLayout xmlns:android="http://schemas.android.com/apk/res/android"
    android:layout_width="fill_parent"
    android:layout_height="fill_parent"
    android:id="@+id/tble1">

 </TableLayout>
Android TableLayout Example
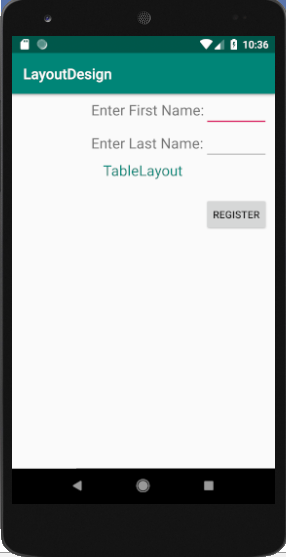
You can use the below code to modify your XML code for the layout design. Update your activity_main.xml file with the following code.
activity_main.xml
<TableLayout xmlns:android="http://schemas.android.com/apk/res/android"
    android:layout_width="fill_parent"
    android:layout_height="fill_parent"
    android:id="@+id/tble1">

    <TableRow>

        <TextView
            android:text="Enter First Name:"
            android:layout_width="wrap_content"
            android:layout_height="wrap_content"
            android:layout_column="1"
            android:textSize="20sp"/>

        <EditText
            android:width="200px"
            android:layout_width="wrap_content"
            android:layout_height="wrap_content" />
    </TableRow>

    <TableRow>

        <TextView
            android:text="Enter Last Name:"
            android:layout_width="wrap_content"
            android:layout_height="wrap_content"
            android:layout_column="1"
            android:textSize="20sp"/>

        <EditText
            android:width="100px"
            android:layout_width="wrap_content"
            android:layout_height="wrap_content" />
    </TableRow>

    <TableRow
        android:layout_width="fill_parent"
        android:layout_height="fill_parent"
        android:gravity="center">

        <TextView android:layout_width="match_parent"
            android:layout_height="50dp"
            android:text="TableLayout"
            android:textColor="@color/colorPrimary"
            android:textSize="20sp"/>
    </TableRow>

      <TableRow
        android:layout_width="fill_parent"
        android:layout_height="fill_parent">

        <Button
            android:layout_width="wrap_content"
            android:layout_height="wrap_content"
            android:text="Register"
            android:id="@+id/button"
            android:layout_column="2" />
    </TableRow>

</TableLayout>
The graphical representation of the above code which looks like :